Campaign
There are five different objectives in the campaign, each with at least three different missions. When you start you create a mission deck with stage one of each of the objectives. Draw a card, fly that mission, and then do what the card tells you based on whether you completed or failed the mission. In many cases if you fail a mission the card goes back into the deck and you can try again. In at least one case if you fail you still remove the card and replace it with the next one for that objective.
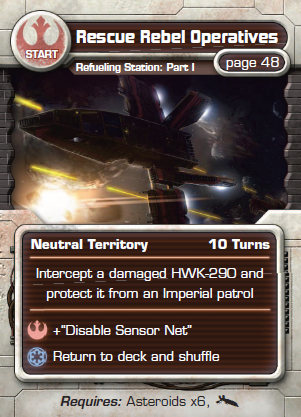 Here’s an example of a starting mission card. The story arc is called, “Refueling Station” and the first mission is called, “Rescue Rebel Operatives.” In addition to the standard Imperial forces (and of course whatever Rebel ships the players are flying) this mission calls for six asteroids and an NPC (non-player-character) HWK-290. In the introductory story the Rebel pilots are being scrambled to escort a damaged HWK-290 back to base and protect it from the Imperial forces that are out to destroy it. Some AI (Imperial) ships might have the “Attack” AI meaning they will simply attack the most appropriate Rebel target as previously outlined. But others might have the “Strike” personality, meaning they are after the HWK even if other targets are closer and/or in arc and would normally be chosen. This is part of the fun of having a GM run your campaign as you would not have any way to know this ahead of time. It would be one of the surprises that is revealed over the course of the mission.
When I ran the campaign as a GM I would have the Rebel leader randomly draw a card from the mission deck at the end of each session. That gave me a week to prepare (and make sure I had all of the supplementary materials required). The Rebels would find out what their next mission was during the briefing at the beginning of our next session, have a sort planning period, and then off we would go!
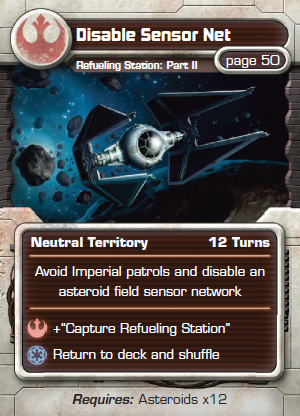
As mentioned above, each story arc contains three (or in one case four) missions. If you complete a complete story arc successfully then the Rebel Forces score a point. At various points if you fail a mission the Imperial side gets a point. I’ve played through the entire series three times now, and we never worried about winning as the Rebels, we finished every mission we could. It’s just that fun. 🙂
The mission deck never has more than five cards in it. As you complete an objective, the mission deck shrinks. It’s a great mechanic that means you don’t always fly missions in the same objective which adds variety.
Readers may have noticed that I have several times mentioned running the campaign as a Game Master. Is that required?